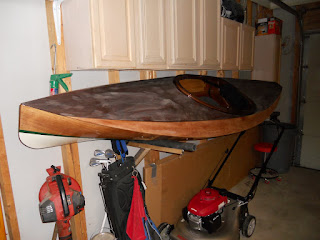
I decided today would be a great day to put in at the lake and paddle up there, its around a 2 or 3 mile paddle one way.
As I drove down the hill to the boat ramp I got stopped in my tracks. The road dissappeared into the lake. There is supposed to be a 200 spot parking lot and a 200' wide boat ramp just in front of those trees on the left side of what is now the lakeshore. A truck and trailer was parked beside the road so I decided to just launch from here too. There was some grass/mud on the side of the road to launch from. The lake must be a good 15ft high. I have seen it wash up the parking lot but never left the road underwater that I had seen.

About 3/4 mile into my paddle I passed a small, single lane boat ramp and its one light post in the parking lot gives an idea of the height of the water.
 The high water made finding the creek that feeds the lake difficult even with my GPS on my phone. I have motorcycled to this lake often but never actually been out on it so I just kept paddling east as far as I could see. I made one wrong turn into a dead end and then "corrected" further northeast into another flooded "inlet" I paddled another half mile and couldnt make out any channel, just trees and bushes as seen below. It became obvious I was actually paddling through a flood plain that leads to nowhere instead of up a creek. In total with 2 wrong turns I paddled about a mile out of the way. So back another mile to the actual creek.
 Below is where I took the wrong turn. Which way would you have turned to find the creek at the end of the lake? I turned left also. Right is the actual creek. I paddled up it about a mile and I think I saw the road to the falls coming out the woods up ahead and it looked like the falls and the parking lot nearby was all under water. So I just turned around and will do this paddle again in the fall.
 I only saw 3 boats in the 3 hours I was out. Turns out the other ramps are all flooded too and only way to launch a trailer boat is by using the road where the water meets it as a launch ramp and park on the roadside. I was also told by the fisherman in the boat that launched where I did that the boats that are kept in the water in a slip are only accessable by another boat, the walkway from shore to the slips is more than 10ft underwater. Those slips are in the very far distance in the pic below and just around the bend to the left. After about 5 miles of paddling and forgetting the sunblock I didnt want to go all the way down there.
 I did paddle to the rocks on the right of the above pic, here they are close-up. Im no rock-oligist err, geologist, but I suspect this is good ol Indiana Limestone.
 Here is another pic that shows the height of the water. Normally the arch in a bridge is not underwater. I passed a kayak fisherman as i approached this bridge heading back to my truck and he said that this spring the water was so high they closed this bridge and thus state highway 42 that goes across it. Now THAT's some high water!!!
 Its odd that the other lake I was on last week with my Glen-L Zip is only about 25 miles north of this one and it was actually below normal levels. The reservoir closest to my house is right at normal level. Weird, anyway I will have to revisit this one when its back to normal level and get pics of the falls.

 From the ramp I paddled south a quarter mile to "Ricks Cafe Boatyard" The only restaurant on the lake. There are over 100 slips for rent seasonally at the cafe.
 From the cafe I paddled across the reservoir to the west, past the dam to the inlet and down the inlet to the Eagle Creek Sailing Club. Roughly a mile.
 I enjoy looking at the sailboats and the names on them. The sailing club has weds evening regattas which are enjoyable to watch from the kayak or the cafe deck.
 Apparently THIS is where the "Fun Police" are stationed.
 Personally, I like "Don't Panic" written in inverted letters. I find it somewhat humorous that people have 26' sailboats on a 4 mile long lake with a 10ft clearance bridge which makes only 2.5 miles of the lake usable to saiboats. We gotta work with what we've got here in Indiana.
 This is just a shot leaving the sailing club, out the inlet. In I few minutes I would run up to a couple of other Chesapeake Light Craft wood kayaks just entering the inlet ahead. I learned the couple were paddling a "Artic Hawk" and "Shearwater" models of touring kayak. They are much sleeker and longer than my Wood Duck and I was curious if I could keep up with them so I turned around and paddled in their direction for a minute. It seemed I was working a little harder than they were but I was able to keep pace just fine. They didnt seem interested in chatting about kayaks so I turned around and continued on. I would have liked a closer look at their yaks but just asking the models seemed to bother them.
 After exciting the inlet I paddled back across the lake about a 45 degree angle toward "Hobie beach" At this point I got passed and stopped by a older guy on a really cool wooden gaff-rigged catboat about 13' long. He had been behind me pulling into the boat ramp park and was interested in my kayak. We talked for a bit about it and about his boat, after a few minutes we went on our way. I wish I would have got a picture of his boat. I continued on toward Hobie beach where for $500/season the park will give you a gate key to beach your catamaran, or dinghy sailboat here. The people appear to hangout, drink and eat more than they sail. They have a small tiki-hut bar they bring out each year, grills, picnic tables and easy up tents. There are always a few people there chilling out for the day.
 I then crossed the lake again at about a 45 degree angle working farther north each time I cross. I found this cool little boat tied up infront of a really big house on the lake. It cant be but 12' long or less. It looks like a ton of fun for kids and adults. I just dont know what the brand or model is. It didnt have much of any markings on it. As I paddled down this finger in the lake a little farther there was a second one of these docked there, very cool little boats.
 I then paddled across the lake again at a 45 degree angle northward, almost up to the bridge that splits the lake. Finally, I paddled into the headwind along the shore all the way back to the boat ramp. The trip lasted about 2.5 hours and I estimate I paddled 4.5 miles. This will likely be my most regular paddle since its so close to home. Next time out I will do the northern half of the lake.


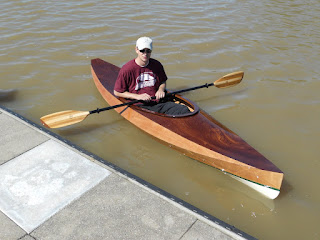
 Finished the 3rd coat of varnish on the deck today. I added a little too much thinner so it was easy to leave a couple "holidays". As much as I enjoy it my brain cells need some time to detox from huffing fumes everyday. I'll launch the kayak as is, and when we get a perfect day for varnishing, I will do another coat on the deck to try and eliminate the thin spots. Im really, really pleased with the smooth, glassy finish the Epifanes varnish provides.

 In the picture above you can see that the seat is built from two layers of foam which you need to glue together with contact cement. Mine had a chunk missing from the bottom piece. The missing chunk broke off along the outside edge and is nowhere to be found in the packaging. My only complaint about the entire kit has been the packing. I was shorted fiberglass tape, you might remember and now the seat is missing a chunk of foam, not a big deal as its hidden from view and I am sure they would send another if I emailed CLC about it but there seems to be room for improvement in the packaging quality control. Anyway...