This evening UPS delivered the fiberglass tape I was missing. Chesapeake Light Craft says my kit should have shipped with a full roll of the FG tape plus some extra that is hand rolled and packed with the kit. My kit slipped out the door with only the one roll. You can see the little roll of FG tape in the pic below, thats all that i needed.
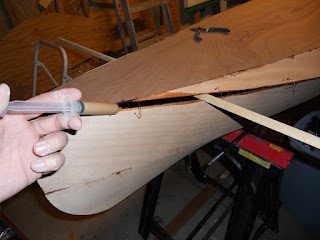
 I got to work right away on the port side seam. Fiberglassing this inner seam is the most uncomfortable part of the build. You have to be able to reach inside the boat as close to the ends as possible to lay the epoxy fillet and the glass in the seam. In the picture above you can see the required items for the job and some of my special hand made tools for reaching far into the boat. In the picture I am actually finished with the job, its the far left seam.
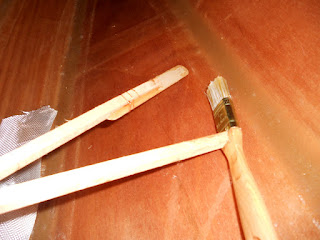
Here is a close up of my tools. Just a 1" brush and a tongue depressor glued to some sticks. Another trick the instructions show is to pre-cut the tape to length then roll it up and place the tape right into the mixed cup of epoxy to pre-soak it. Then, place the roll at the aft end of the seam and roll it out along the seam. You then only have to wet out any dry areas which means a lot less time spent with your head and arms in awkward angles reaching inside the boat. Its just messy, gloves are a must.
If this side cures fast enough, I may do the opposite side right before i go to bed tonight.
Edit: I did get the other side done tonight, glad that step is over.
 I also bought a carbon fiber eyestrap from CLC. This item is a dissapointment. It looked much bigger in the pictures online. Its made of carbon fiber and looks cool close up. In actuality the eyestrap is very small. Only a very small diameter rope will fit through its opening. At 9$ each I am glad I only bought one. I wish it was about twice the size that it is. The catalog says a friend of CLC hand makes these eyestraps. To install them the strap is simply epoxied in place.
  All I have done building wise this week is plane the deck/hull junction on the exterior. There is a slight overhang in a couple spots that needed trimmed down.


 After all the wires are twisted together I applied stretch wrap tape over the hull and deck to further secure the two together.